Progressive IP Blocking: Stopping WordPress Brute Force Without False Positives

To block brute-force attacks on WordPress without locking out real people, ReportedIP Hive makes every block as long as the address has earned: a first offence costs a short block, and only an address that keeps coming back climbs to long bans. A mistyped password therefore never costs a customer a whole day.
This guide explains the escalation ladder, when it resets, how manual blocks and the whitelist fit in, and what a blocked visitor actually sees.
Why does a fixed block length fail against brute force?
A single block length forces a bad trade-off. Keep it short, and a botnet simply waits and tries again. Make it long, and the employee behind a shared office connection or the customer behind a mobile carrier’s NAT is locked out for a day after a few typos. The OWASP Authentication Cheat Sheet warns about exactly this: lockouts that are too strict become a denial-of-service against your own users.
Progressive blocking resolves it by letting the history of an address decide. Whoever trips a sensor once gets a short break. Whoever keeps attacking gets longer and longer blocks, up to a cap measured in days.
How the escalation ladder works
- A sensor, for example failed logins, sees an address cross its limit.
- Hive blocks the address. Its first block is the shortest step of the ladder.
- If the same address is blocked again within the reset window, it moves one step up and the block lasts longer.
- A very heavy burst, a multiple of the limit in one go, can skip steps, so an obvious attack does not start at the bottom.
- Once an address stays clean for a full reset window, it starts again at the first step. A one-off mistake leaves no lasting mark.
The ladder counts earlier blocks of an address, not single failed attempts. Wrong two-factor codes and wrong reset codes are also slowed down with a growing delay before they turn into a block, so guessing a code is as hopeless as guessing a password.
How to watch the ladder at work
Every block shows up twice. The Event Log under Activity records the event that caused it, with the sensor, the address and the time. The Blocked list under IP Lists shows the block itself, with its type and the column Blocked Until. If the same address appears again a few days later with a later expiry, the ladder has moved it one step up. An address that stays away long enough disappears from the list and starts from the beginning if it ever returns.
On a busy site the pattern is easy to read: most addresses are blocked once and never come back, a few return again and again and end up on the longest steps. Those are the ones worth a manual permanent block or a report to your host.
Where to switch blocking on and test it
Open Protection, card Blocking & Escalation. The normal view shows the two switches that matter day to day:
- Automatic blocking refuses an address once a sensor limit is passed. Switched off, the sensors only record.
- Report-only mode records every decision without acting on it, so you can watch what the settings would do before they do it.
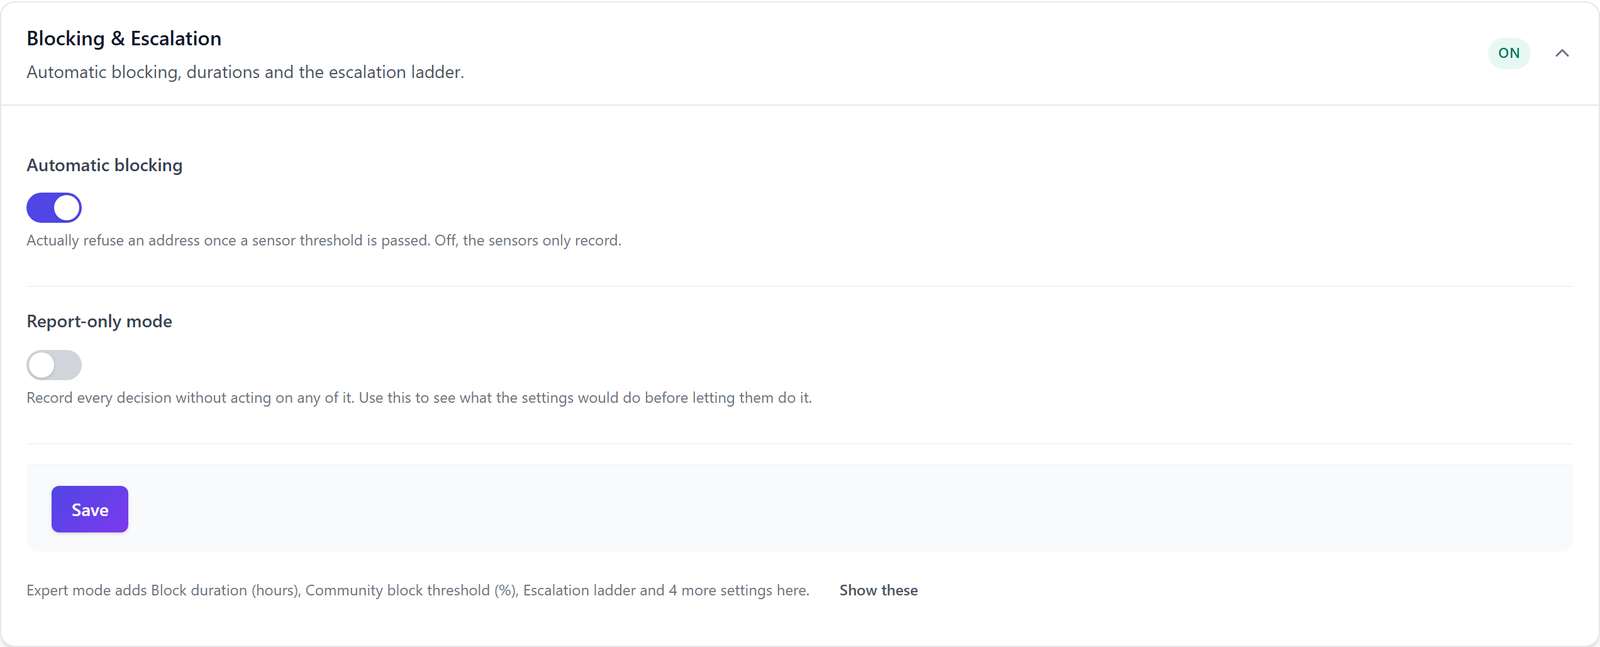
Expert mode shows the ladder itself
Turn on expert mode in the page header to edit the ladder. These settings then appear in the same card:
| Setting | What it does |
|---|---|
| Escalation ladder | Switches progressive blocking on or off |
| Escalation ladder steps (minutes) | The length of each step, as a comma-separated list |
| Ladder reset window (days) | How long an address has to stay clean before it starts again at the first step |
| Block duration (hours) | One fixed length for every block, used only when the ladder is off |
| Community block threshold (%) | From which confidence score an address known to the network is refused |
| Block Tor exit nodes | Refuses traffic from the Tor network, on the Professional plan |
| Contact URL on the block page | A page where blocked visitors can reach you |
The defaults suit most sites. Shorten the first steps if your visitors often share addresses, lengthen the upper steps if a botnet keeps returning after each block.
Manual blocks and the whitelist always win
Under Activity, tab IP Lists, the form Block an IP Address takes a single address or a CIDR range, a reason and a length: 24 Hours, 3 Days, 1 Week, 30 Days or Permanent. Import Blocked IPs from CSV adds a list of single addresses in one go. A manual block keeps the length you picked, because the automatic path skips every address that is already blocked.
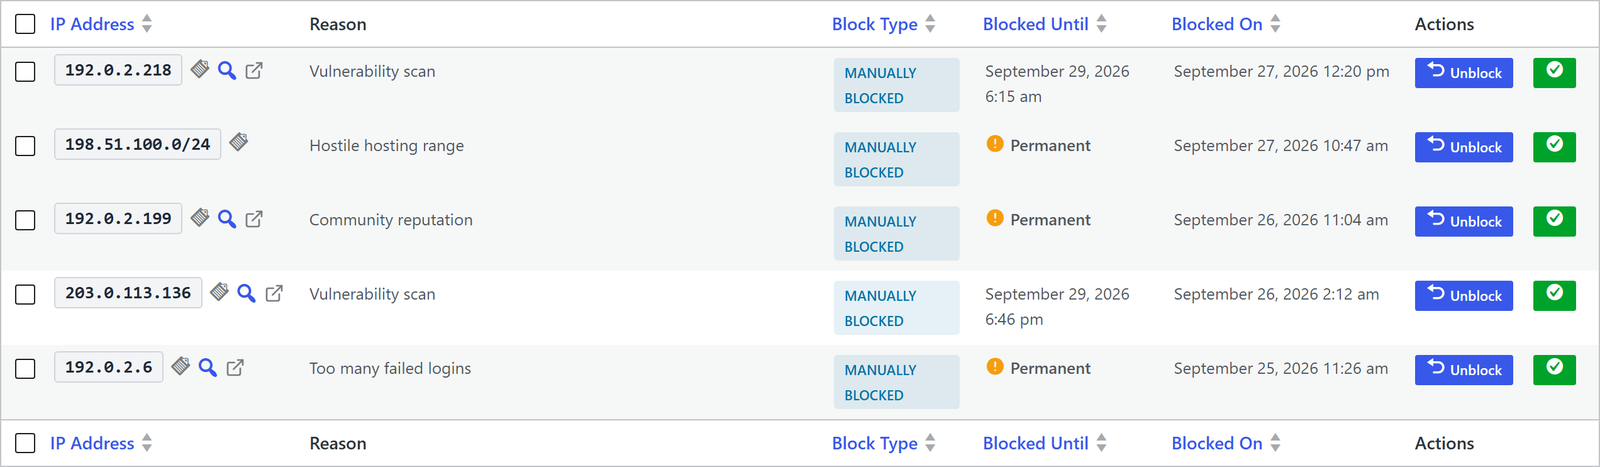
The Block Type filter separates manual blocks, automatic blocks, blocks based on community reputation and group bans. Every row offers Unblock and Move to Whitelist. Whitelisted addresses and ranges are never blocked automatically, so the office network, your VPN and your uptime monitor belong there first.
What a blocked visitor sees
A blocked address receives an HTTP 403 page titled Access Denied. It shows the visitor’s IP, the time, the reason and a reference code, and it offers a Contact administrator button as soon as you set a contact URL. When someone writes in, the reference points you straight to the right entry in the log.
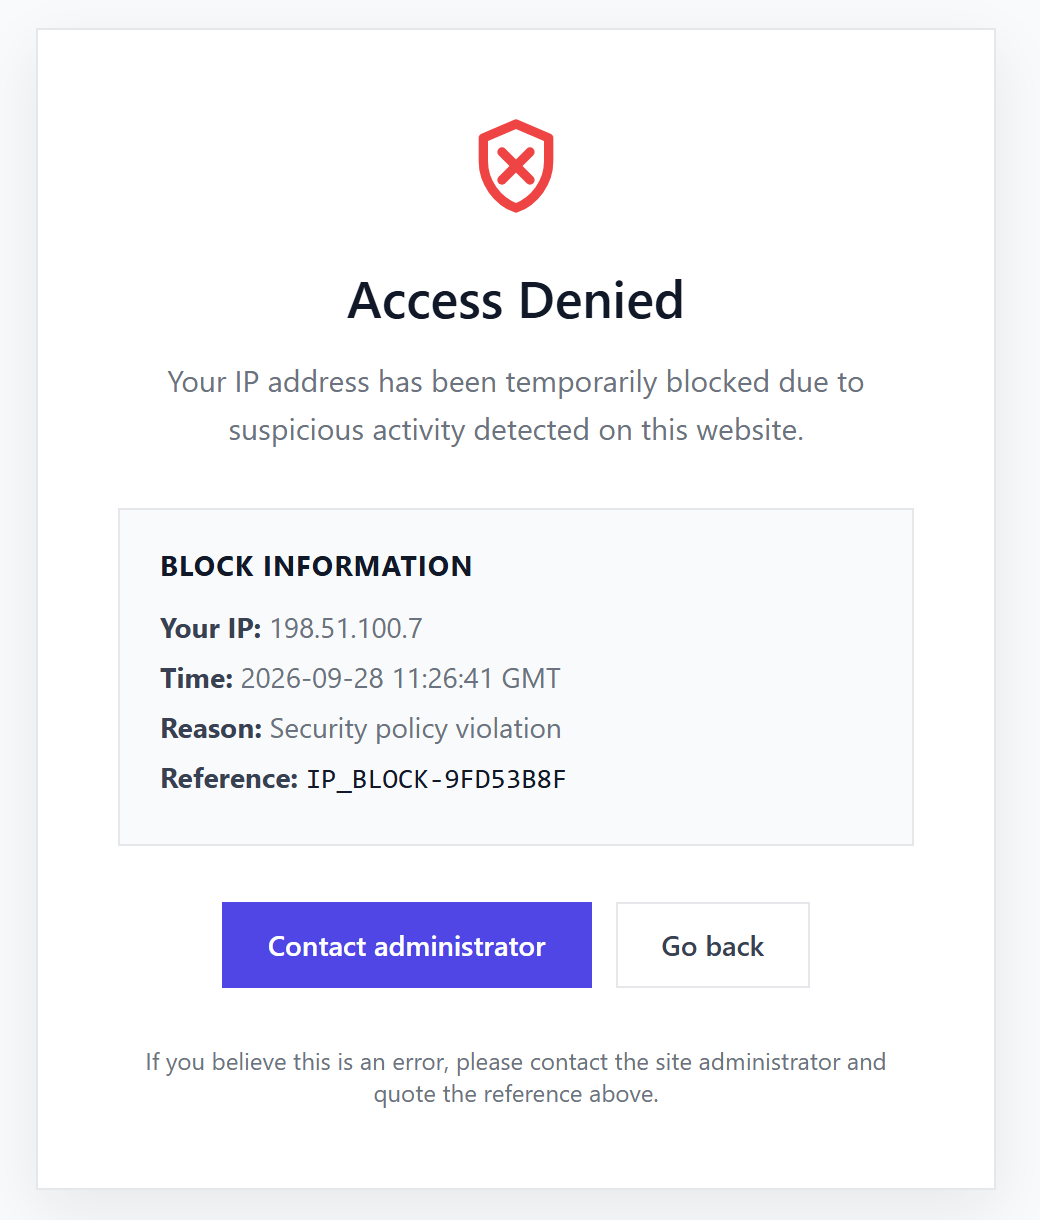
The page tells every caching plugin not to store it, so WP Rocket, W3 Total Cache, WP Super Cache, LiteSpeed Cache and Cloudflare never serve a block to a legitimate visitor. AJAX and REST requests receive a short JSON error instead of the page. If you use the optional Extended Protection drop-in from the Tools page, blocked addresses are refused before WordPress even loads, with a plain 403 and without the page, which saves server load during an attack.
Which plan includes progressive blocking?
The escalation ladder, manual blocks, the whitelist and the block page are part of the free plan and work in Local Shield without any outside connection. Professional adds Tor blocking and Hardening Mode, which tightens the limits automatically while a coordinated attack is running. In Community Network mode, every block also becomes an anonymised report that warns the other sites in the network.
Questions about blocking brute-force IPs in WordPress
How do I unblock myself if I locked myself out?
Log in from another network, for example your phone’s mobile connection, and remove the entry under Activity, tab IP Lists, with Unblock. If you have shell access, the WP-CLI command of the plugin can lift the block as well. Afterwards, put your own network on the whitelist so it cannot happen again.
Does progressive blocking lock out users behind a shared IP?
A shared address only climbs the ladder if attacks from it continue, and a clean reset window brings it back to the shortest step. Offices and schools with a fixed address can be whitelisted. For mobile networks the short first step keeps collateral damage to a few minutes.
Can I use one fixed block length instead of the ladder?
Switch off Escalation ladder in expert mode and set Block duration (hours). Every automatic block then lasts exactly that long, regardless of the history of the address. Most sites are better served by the ladder, because it punishes repeat offenders harder without hurting one-time mistakes.
Why does my site sit behind a proxy address in the block list?
Behind Cloudflare, a load balancer or a reverse proxy, WordPress sees the proxy instead of the visitor. Set the client IP header and the trusted proxy ranges in expert mode in the card Detection & Thresholds. Without that, a single block would lock out every visitor who arrives through the same proxy.
Read on
The Hive documentation covers the block escalation, the trusted proxy settings and the cache plugin compatibility in detail.